
What to Pack for Kilimanjaro: The Complete Gear Checklist
Many first-time Kilimanjaro climbers make one of two mistakes: they bring too much and exhaust themselves hauling unnecessary weight, or they cut corners on critical gear and suffer through a summit night they weren't prepared for. A proper gear checklist for Kilimanjaro climbs isn't just a convenience; it's the difference between reaching Uhuru Peak and turning back somewhere above 4,500 meters with frozen fingers and a dead headlamp. This gear checklist for first time Kilimanjaro climbers covers every category, layers, footwear, sleeping gear, summit essentials, and a rent-versus-bring breakdown, so you arrive at the gate with exactly what you need.
What makes packing for Kilimanjaro genuinely different from any other trek is the climate range. In seven to nine days, you'll move through five distinct climate zones, from humid rainforest at around 1,800 meters to arctic conditions near -20°C on summit night. Your gear has to perform across all of them. Experienced local operators who have guided hundreds of climbers up the Machame and Lemosho routes know exactly which items separate a successful summit push from a miserable bailout.
This guide breaks everything down by category: layers, footwear, sleeping gear, summit essentials, accessories, and a clear rent-versus-bring breakdown. Use it as your pre-departure reference and you'll arrive at the Kilimanjaro gate with exactly what you need and nothing you don't.
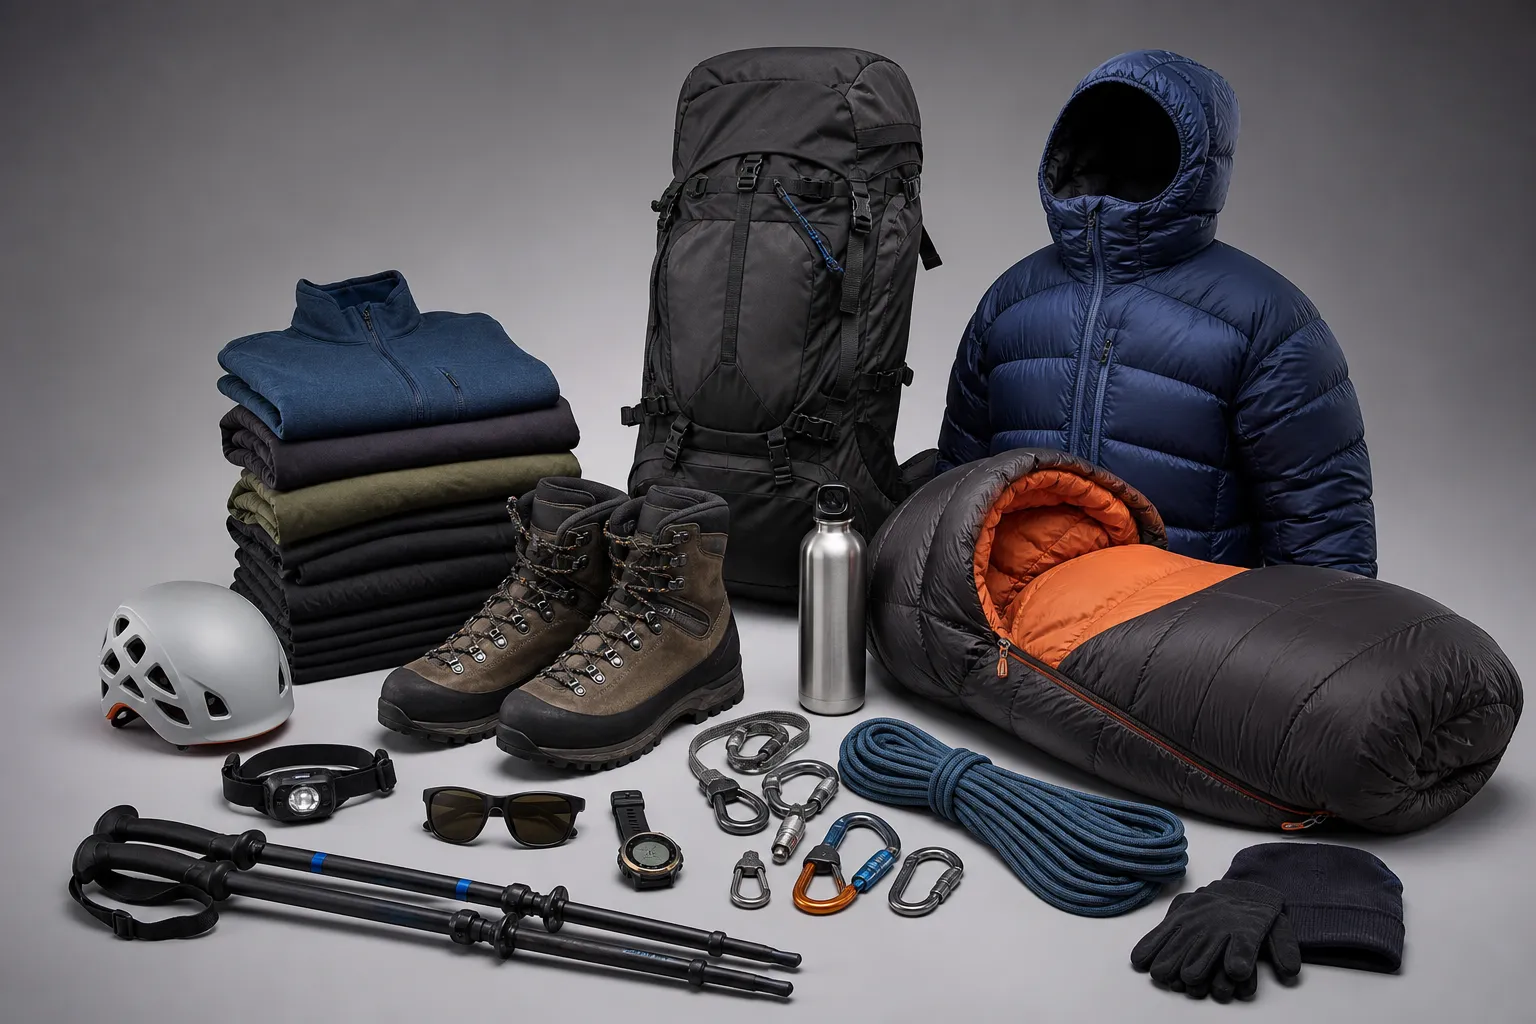
Kilimanjaro packing list: clothing layers from base to shell
The four-layer system, base, mid/fleece, insulating down, and shell, exists because Kilimanjaro demands all four simultaneously in your pack. Note that "mid" and "insulating" are two distinct garments: a fleece midlayer handles active hiking and cold camp evenings, while a down jacket handles summit night and high-altitude camps. You need both. Temperatures swing from 30°C at the gate to -20°C on summit night, and a climber who relies on two or three layers instead of four will feel that gap painfully somewhere around Stella Point. For a 7, 9 day trek, plan on two base layer tops and bottoms, one fleece, one down jacket, and one waterproof shell jacket and pants.
Base layers: moisture management from the first step
Choose midweight or heavyweight merino wool or synthetic long-sleeve tops. Cotton fails completely at altitude: once wet with sweat, it stays wet and pulls heat away from your body. Two pairs of base layer tops and bottoms is the minimum for any trek over seven days, and they double as sleepwear at camp to reduce the weight of carrying separate pajamas. Merino manages odor better over multiple days; synthetic dries faster if you wash on the trail.
Mid and insulating layers: the difference between uncomfortable and dangerous
These are two distinct items, and one cannot substitute for the other. The fleece, a 200-weight midlayer, handles active hiking and cold camp evenings. The down jacket (600+ fill power, rated for -10°C or lower) is specifically for summit night and high-altitude camps. Climbers who bring only one of these two items consistently struggle on summit night. Pack both without compromise.
Shell jacket and waterproof pants: your wind and rain armor
A Gore-Tex or equivalent hard-shell jacket with pit zips and a helmet-compatible hood is the right spec. Waterproof pants with full side-zip legs matter because you need to pull them over your boots at camp or during a rain squall without removing your footwear. One set of shell jacket and pants covers the entire trek on any route. Lemosho climbers should treat waterproofing as non-negotiable, camping in rain without a solid shell is genuinely miserable.
Footwear that actually holds up on Kilimanjaro's terrain
Your boots are the one item that absolutely cannot be improvised at the last minute. A poor boot choice leads to blisters, ankle rolls, and misery on the descent. Get this right before you board the plane.
Boot specs that matter: ankle support, waterproofing, and sole stiffness
The sweet spot is a 3-season waterproof hiking boot with a semi-rigid Vibram-type sole. Rigid mountaineering boots are overkill for Kilimanjaro's non-glaciated standard routes, and trail runners lack the ankle support and waterproofing for the upper zones. Size up a half to full size from your normal shoe size to accommodate thermal socks and prevent your toes from striking the front during steep descents.
How long to break in your boots before the climb
Three to four full-day hikes on rocky, uneven terrain wearing the exact socks you'll use on the mountain. Your boots are ready when the insoles have contoured to your foot and any hot spots have been identified and resolved. Hot spots discovered at home are a minor inconvenience; hot spots discovered on day three above Shira Camp become full blisters you'll carry for the rest of the climb. Synthetic boots need less break-in time than leather, but both require real trail time before departure.
Socks, gaiters, and camp footwear
Bring five to seven pairs of merino wool hiking socks for a 7, 9 day trek. Overpacking socks is one of the best decisions a first-timer can make. Gaiters are particularly useful on the Lemosho and Machame routes, where scree and mud work their way into boots on the upper sections. A pair of lightweight Crocs or camp sandals saves your feet at basecamp each evening and weighs almost nothing in your duffel.
Gear checklist for first time Kilimanjaro climbers: sleeping gear essentials
The sleeping bag is where first-timers most commonly cut corners and regret it. A 3-season bag is not sufficient for Kilimanjaro, full stop. Summit night temperatures drop to around -20°C on any route in any month of the year, and operators universally recommend a 4-season bag with a comfort rating of -18°C (0°F). Note the distinction: the comfort rating reflects the temperature at which you sleep well, not the extreme survival threshold. That survival number is meaningless for a night when you need actual rest before a midnight summit push.
Sleeping bag temperature ratings for summit night
A comfort rating of -10°C to -15°C is the minimum standard; -18°C is the preferred safety margin that serious operators recommend regardless of season. If you're renting locally, this is the specification to ask for by name. If your budget doesn't allow buying a 4-season bag for a single trip, renting a properly rated bag in Moshi is a far better option than bringing an underspecified bag from home.
Sleeping pad, liner, and pillow: what earns its weight
A foam or inflatable sleeping pad provides critical insulation from the tent floor that your sleeping bag cannot compensate for on its own. This matters on Lemosho and other camping routes where you're sleeping directly on cold ground. A silk or fleece liner adds 3, 5°C of warmth and keeps your bag cleaner across seven nights. An inflatable camp pillow is optional but adds negligible pack weight for meaningful overnight comfort.
Your summit-night daypack: what goes in and what stays behind
Summit departure happens at midnight. Your daypack on this specific night needs to be lean, organized, and carrying the right items in the right pockets. A 28, 35 liter daypack handles the daily load comfortably while staying within the recommended 6, 9 kg carry weight. KPAP-certified operators enforce a 15 kg ethical porter limit, with a 20 kg legal maximum. Anything beyond that rides in your daypack.
Headlamp, water, and snacks: the summit-night non-negotiables
A 100+ lumen headlamp is mandatory, and the spare batteries go in your jacket's inner pocket, not the pack. Cold drains batteries rapidly, and a warm pocket keeps them functional. Carry 2, 3 liters of water in wide-mouth Nalgene-style bottles stored upside down, ice forms at the cap, not the bottom, so the liquid stays accessible. Hydration bladder systems freeze and crack at summit temperatures. For snacks, choose foods that don't harden in the cold: energy gels, trail mix, chocolate, and energy chews that you can eat wearing gloves.
Personal medications and first-aid items
Ibuprofen or aspirin for altitude headaches, antacids, moleskin for blisters, and any personal prescriptions all belong in an inner jacket pocket to stay warm. Altitude medication such as Diamox (acetazolamide) should be discussed with your doctor before departure. The standard recommendation is 125 mg twice daily, starting 24, 48 hours before your ascent begins, not just on summit night. Carry it throughout the climb and continue for two days after reaching your highest sleeping elevation.
Accessories and high-altitude trekking gear first-timers always underpack
These items don't fit a single category, but they directly affect your chances of reaching the summit. Trekking poles reduce knee strain substantially on the descent, where most summit-day injuries happen. Telescoping carbon fiber or aluminum poles are both fine choices. The accessories listed below are not optional extras; they're functional gear that earns its place in your pack.
Sun protection and trekking poles
UV exposure above 4,000 meters is intense, even through cloud cover. Bring SPF 50+ sunscreen and SPF lip balm and apply both before leaving camp each morning. For sunglasses, the correct specification is Category 4 lenses with 100% UV400 protection and wraparound frames that block light from entering around the sides. Category 3 is technically acceptable at lower elevations, but at summit altitude with snow glare, Category 4 glacier sunglasses are the correct call, a rating that most experienced guides recommend for summit day across all routes.
Electronics, camera gear, and the cold-battery problem
Cold kills phone and camera batteries faster than most climbers expect. Keep your phone, camera, and spare batteries inside your jacket against your chest throughout the summit push. At the crater rim, retrieve the camera for photos, then return it to warmth. A portable power bank stored in an inner jacket pocket can revive a phone on a long summit day when you need navigation, photos, and communication all at once.
Kili gear checklist for first-timers: what to rent locally vs. what must come from home
Not every item on this checklist requires a purchase before departure. Moshi has a well-developed gear rental infrastructure with reputable outfitters near the mountain, and booking through a certified local operator ensures access to inspected, appropriate equipment rather than whatever happens to be on the shelf.
Gear you can rent in Moshi or Arusha
Sleeping bags (rated to -15°C or -18°C), sleeping mats, trekking poles, gaiters, and duffel bags are all reliably available for rent. Per-trip rental costs typically run $35, $50 for a sleeping bag, $10, $20 for a pair of trekking poles, $10, $15 for gaiters, and $10, $30 for a duffel. Total rental cost for all four items usually lands between $70 and $115 for the full trip. Booking through an operator rather than walking into a random shop ensures the sleeping bag temperature rating is actually what's advertised.
What must come from home, no exceptions
Your boots (already broken in), base layers, personal medications, headlamp, glacier sunglasses, and any prescription altitude medication must be sourced before you leave the US. Footwear especially cannot be improvised at the last minute, a rental boot that doesn't fit your foot is a blister factory. A locally rented headlamp may not deliver the output or battery life you need for a midnight summit push. These items are personal enough that they require your specific sizing, fit, and pre-tested performance.
How Kilimanjaro Local Trips takes the guesswork out of gear prep
Every climber who books with Kilimanjaro Local Trips receives a comprehensive, route-specific gear checklist as part of the pre-trip support package. The list is organized by category, flags what can be rented locally at what cost, and comes with direct access to the team for questions in the weeks before departure. Ensuring that climbers arrive at the gate properly equipped is a standard part of the service, built into the pre-trip process from the moment you book, not bolted on as an afterthought.
You're more ready than you think
Packing for Kilimanjaro gets straightforward once you break it into categories. Nail the four-layer clothing system, invest in the correct sleeping bag temperature rating, know your porter duffel weight limit, and get summit-night essentials sorted before you leave home. The mountain is challenging enough on its own terms; your gear should be the one variable you've already solved.
Work through this gear checklist for first time Kilimanjaro climbers category by category in the weeks before departure. If something feels unclear, especially around sleeping bag ratings, boot sizing, or what to rent locally, a knowledgeable local operator removes that uncertainty entirely. The climbers who summit confidently are the ones who prepared methodically, not the ones who packed the fastest.
Uhuru Peak at sunrise is one of the most extraordinary experiences on the planet. Get the gear right and you'll be standing there with enough energy to actually enjoy it.